Django and asynchronous jobs

I’m going to focus on RabbitMQ & Celery, what it buys you and why and when to use it. Eric’s blog always seems to be a couple months ahead of mine, so instead of re-hashing what he wrote, I’ll let you read his blog and then come back and finish my complimentary post. Go there now. I’ll wait.

Here’s the mini-rehash for those who didn’t actually go read it. Basically, RabbitMQ is a general purpose messaging queue system based on the AMQP protocol. When you need something to get executed, you simply queue up a message with RabbitMQ. It won’t get lost if Rabbit restarts, you can be pretty confident that your tasks will eventually get executed or you’ll be able to find out why they didn’t. Celery (and django-celery) is a Python library for queuing up tasks to be executed and for actually executing these tasks asynchronously. It gets its tasks from RabbitMQ although it does work with other queues as well.

Why RabbitMQ & Celery?

Not everyone needs to execute asynchronous tasks. If you’re reading this and asking yourself “why would I ever need that,” you probably don’t need it. My project involves data analysis that takes minutes for each item in the database. In addition, I periodically re-analyze items in the database. At first, I built a cronjob (using Django management commands) which would wake up and check for new items queued in the database every minute. Then, I built a second cronjob for re-analysis. As the system grew, this became hokey and had issues anytime the database crashed during this analysis. Anytime your Django view connects to some external service that may or may not be up (source control, web services) or may take a while (shell commands, massive database queries, etc.), it’s probably best done asynchronously. It’s also great for anything that needs to be executed periodically at a particular interval (caching, expensive calculations). Celery also provides built-in ways to retry failed tasks a specified number of times at a specified interval which is particularly useful for ensuring that things actually get done.

Setup & integration with Django

My Django views didn’t change much after I switched to Celery. Instead of adding an item to the database when I want to queue up an item for analysis, I simply queue up the execution of a @task with django-celery. The particular tasks that your application can handle are simply placed in a tasks.py file in your Django applications. To process the tasks, you simply run python manage.py celeryd. It can also be setup to run at boot time using init.d (Ubuntu/Debian, Redhat/Fedora). Celeryd clients can connect to Rabbit from the same server as RabbitMQ or a different server or servers in order to distribute the load.

The nitty gritty

One useful bit that I had to dig to find in the Celery documentation was on locking a particular task so that two different workers don’t work on the same thing at the same time. This could happen in my application if two users queued up analysis on the same item for example. The trick is to use Django’s cache framework and lock a particular item in the cache.

A word on Djangocon

Unlike last year, I convinced work to send me to Djangocon in Portland next week. I’ll probably do some live blogging on some of the interesting topics. If you’ll also be there, say hi!
Piston Looks Good, But I’m Not Using It

Edit (November 2, 2012): This is horribly outdated. Use class-based views or tastypie.

Firstly, I’ve been missing in action for a few months and I apologize to you, my loyal reader, for that. Without making excuses (here comes the excuses), work has been picking up, my girlfriend moved from about 15 miles away to only about 8 blocks away and Starcraft II is in beta. Regardless, I’m back in the Python action. WoooHooo!

REST interfaces & Django

This post is somewhat of a follow-up on my post on RESTful Django web services because I didn’t really talk in my previous post about Piston. Piston (sometimes django-piston) is a library for creating RESTful services in Django and it supports some of the features that I spoke about in my previous post such as good caching support with Django’s cache framework, different output formats (eg. XML & JSON) via what Piston calls emitters, and the ability but not the requirement to use Django models as REST resources. I don’t know how I missed Piston before, but people blog (*) about it and it has made the rounds on the Django User’s list. However, even after looking closely at it, I decided not to go with it. In this post I’m going to talk about what I did and did not like and why I rolled my own REST micro-framework. That almost sounds like I’m giving myself too much credit given that my micro-framework is only ~30 lines.

(*) BTW, Despite the fact that Eric updates his blog somewhat infrequently (sounds familiar) it is well worth a read.

Piston: the good

Piston ships with quite a bit of good documentation and allegedly is used to power some of BitBucket’s services — lending to its credibility. Specifically, I liked the fact that it plugged directly into Django models. You simply write a short Handler for your model explaining what fields to expose and you’re mostly done.

It effectively wraps up your handler and does all the JSON/XML/YAML serialization for you while still giving you the ability to customize it. On top of this, it plugs in nicely with Django’s form validation and allows you to do some other nice features like throttling requests based on which user does it.

Piston: the bad & the ugly

I started to look at Piston, but because I wasn’t using throttling, using OAuth, outputting anything other than JSON and I wasn’t tying to models I didn’t think that Piston bought me anything. In reality, it wasn’t doing anything my me other than properly returning HttpResponseNotAllowed. My other issue is that this project involved different outputs based on HTTP headers. For example, a GET on a certain URL would return JSON formatted data (a read in the CRUD world) if an HTTP header was present and an HTML page presenting that data if it wasn’t. Piston uses different emitters based on a request parameter format (eg. /path/resource/?format=JSON). Piston gets you up and running quickly, but it didn’t fit my use case.

Also, this is a little nitpicky, but when I see something like:

I cringe a little bit considering that status code 403 is the correct status code for Forbidden. There’s a ticket for this already. Why did Piston define constants for returning various status codes anyway when that functionality is already built into Django. Is rc.DELETED so much easier than HttpResponse(status_code=204)? Perhaps it’s a little clearer and Django really should have HttpResponse subclasses for even the less common responses, but I think this definitely involves repeating yourself (and Django’s mantra is don’t repeat yourself).

The solution

I always wondered why Django didn’t allow for routing URLs based on the HTTP method: It seems like such a common use case. The developers discussed it back in 2006, but in the end it was decided that building only the simple case was best as it yielded a relatively clean urls.py. Building off of that thread, the example in the Django book (search for “method_splitter”) and another blog post, I rolled a little framework to meet my needs instead of using something like Piston.

I found this to be a much simpler and easily extensible. The argument against this is that urls.py becomes bigger, but in a lot of ways I found this to be clearer. From reading the urlpatterns, I can quickly tell exactly what gets called in each case. In addition, routing differently based on HTTP headers, cookies, the source or anything else becomes as simple as adding a parameter and a little code to service_dispatcher.

In the end, it’s wasn’t that I didn’t like Piston, it’s just that I didn’t need it.

Updates April 2010 Edition

Django tickets

There’s been only a little movement on the ticket (#13101) I patched for 1.2. However, there’s been some new developments on the ticket (#10809) I patched regarding authentication with mod_wsgi. There’s been a suggestion to add group based authorization to Django’s mod_wsgi auth handler. There’s still some debate as to whether to use Django groups or Django permissions.

Edit (November 30, 2012): Issue #10809 finally made it into trunk and the release notes for Django 1.5.

django-pyodbc is dead?

In a previous post, I talked about getting involved in django-pyodbc development. We are using django-pyodbc at work but the project is languishing a little bit. The project has never had a formal release, the documentation (other than source documentation) is a little light, and despite patches being submitted to get the code in shape for Django’s upcoming 1.2 release, nothing has been checked in by the developers. In fact, there’s been nothing on the project from the developers since January. I emailed the developers a few days ago offering to help and I haven’t heard anything back yet. I’d much rather keep the project together, but if I continue to get nothing I will probably branch the code line and begin development and maintenance. I’m not looking forward to having to find a Windows box on which to setup multiple versions of SQL Server but I’m hoping to be able to virtualize it.

Edit (June 23, 2010): The developers have gotten involved again and I killed my fork of the project.

RPC4Django updates

I’m planning to put some effort into RPC4Django this weekend and make a release in the next week or two. The main features I’m looking at is the existing blueprint in Launchpad to handle authentication out of the box. Other than that, I got a little feedback on the HTTP access control functionality back in January that I need to test. I also plan to rip out the existing documentation and go to a Sphinx based system. We’ve been using Sphinx at work and I’ve been very impressed with its capabilities.

Why You Should Be Using Pip and Virtualenv

In a previous post, I promised to write about Pip and Virtualenv and I’m now finally making good. Others have done this before, but I think I have a little to add. If you develop a Python module and you don’t test it with virtualenv, don’t make your next release until you do.

Configuring the environment

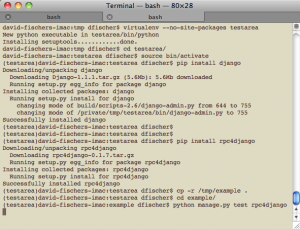
Virtualenv creates a Python environment that is segregated from your system wide Python installation. In this way, you can test your module without any external packages mucking up the result, add different versions of dependency packages and generally verify the exact set of requirements for your package.

To create the virtual environment:

This creates a directory testarea/ that contains directories for installing modules and a Python executable. Using the virtual environment:

Sourcing activate will set environment variables so that only modules installed under testarea/ are used. After setting up the environment, any desired packages can be installed (from pypi):

Packages can also be uninstalled, specific versions can be installed or packages can be installed from the file system, URLs or directly from source control:

Pip is worth using over easy_install for its uninstall capabilities alone, but I should mention that pip is actively maintained while setuptools is mostly dead.

When you’re done with the virtual environment, simply deactivate it:

Do it for the tests

Testing with virtualenv
While the segregated environment that virtualenv provides is extremely well suited to getting the correct environment up and running, it is just as well suited to testing your application under a variety of different package configurations. With pip and virtualenv, testing your application under three different versions of Django is a snap and it doesn’t affect your system environment in the slightest.

Dependencies made easy

My favorite feature of pip is the ability to create a requirements file based on a set of packages installed in your virtual environment (or your global site-packages). Creating a requirements file can be done automatically using the freeze command for pip:

Wsgiref will always appear in pip’s output. It is a standard library package that includes package metadata. The requirements file is used as follows:

The requirements file can be version controlled both to aid in installation and to capture the exact versions of your dependencies directly where they are used rather than after the fact in documentation that can easily become out of date. The requirements file can be used to rebuild a virtual environment or to deploy a virtual environment into the machine’s site-packages. Pip and virtualenv are exceptionally easy to use and there’s really no excuse for a Python packager not to use them.

Note: I’m working on a fairly large sized application for work. When it is finished, I will release a post-mortem that will also function as an update to my post about packaging and distributing.

RPC4Django is Now Hosted in Launchpad

After some discussion in my last post, I decided to host RPC4Django in Launchpad. Every release dating back to 0.1.0 is uploaded and hosted properly there. I also created a 0.1.8 milestone which I hope to work on in the next couple weeks. I tried to request a Launchpad import from subversion but it didn’t go smoothly. Launchpad isn’t really setup to handle imports from password protected subversion repositories to which the password doesn’t give full access. Regardless, all future releases will be from the publicly hosted Bazaar repo in Launchpad.